Construction

Why You Should Consider EPDM Over TPO for Your Roofing Needs

When it comes to choosing the right roofing membrane for your property, two popular options often stand out: EPDM (Ethylene Propylene Diene Monomer) and TPO (Thermoplastic Olefin). Both are widely used in the roofing industry, especially for commercial and flat roofs, but each has distinct characteristics that may make one more suitable than the other depending on your specific needs. In this blog post, we will explore why you should consider EPDM roofing membranes over TPO roofing membranes.

Understanding EPDM and TPO Roof Membranes

Before diving into the comparison, let’s briefly understand what EPDM and TPO roofing membranes are:

  • EPDM Roofing Membrane: EPDM is a synthetic rubber membrane known for its durability and flexibility. It has been used in the roofing industry for over 50 years and is available in black or white, although the black variant is more common.
  • TPO Roofing Membrane: TPO is a single-ply roofing membrane made from a blend of polypropylene and ethylene-propylene rubber. It is typically white and is known for its reflective properties.

Advantages of EPDM Over TPO

1. Proven Longevity and Durability

EPDM roofing membranes have a well-established track record, with many installations lasting 30 years or more with minimal maintenance. This longevity is due to the material’s excellent resistance to UV radiation, ozone, and extreme weather conditions. In contrast, TPO is a relatively newer product with a shorter track record, and some early formulations have experienced issues with durability over time.

2. Superior Flexibility and Elasticity

EPDM is highly flexible and elastic, allowing it to withstand significant temperature fluctuations without cracking or becoming brittle. This makes it particularly suitable for climates with extreme temperature variations. TPO, while also flexible, may not perform as well in extremely cold temperatures, where it can become less pliable.

3. Ease of Installation and Repair

EPDM membranes are known for their ease of installation. They can be installed using various methods, including ballasted, fully adhered, or mechanically attached systems. Repairs are also straightforward, typically requiring only a patch to cover any damaged areas. TPO membranes, on the other hand, require heat welding for seams and repairs, which can be more labor-intensive and require specialized equipment.

4. Cost-Effectiveness

Generally, EPDM roofing systems are more cost-effective than TPO systems. The material cost of EPDM is often lower, and its installation process is less complex, leading to reduced labor costs. Over the lifespan of the roof, the durability of EPDM also translates into fewer repair and maintenance expenses.

5. Environmental Impact

EPDM is a highly sustainable roofing option. It is made from recycled materials and is fully recyclable at the end of its life. Additionally, its long lifespan reduces the frequency of replacement, thus minimizing waste. While TPO is also considered environmentally friendly due to its reflective properties that can help reduce cooling costs, the recycling process for TPO is not as established as that for EPDM.

6. Performance in Adverse Conditions

EPDM membranes are particularly effective in resisting hail, wind, and other severe weather conditions. Their synthetic rubber composition provides a robust barrier against punctures and tears. TPO, while durable, may not offer the same level of resistance to punctures and impact damage.

Conclusion

Both EPDM and TPO roofing membranes have their advantages, but for many property owners, EPDM stands out as the superior choice due to its proven longevity, flexibility, ease of installation, cost-effectiveness, and environmental benefits. If you are looking for a reliable and durable roofing solution that will stand the test of time, EPDM should be at the top of your list.

When making your final decision, consider consulting with a professional roofing contractor who can provide insights specific to your building and climate conditions. Ultimately, choosing the right roofing membrane is an investment in the long-term protection and efficiency of your property.

Tips & tricks

How to Check Your Roof for Damage After a Storm

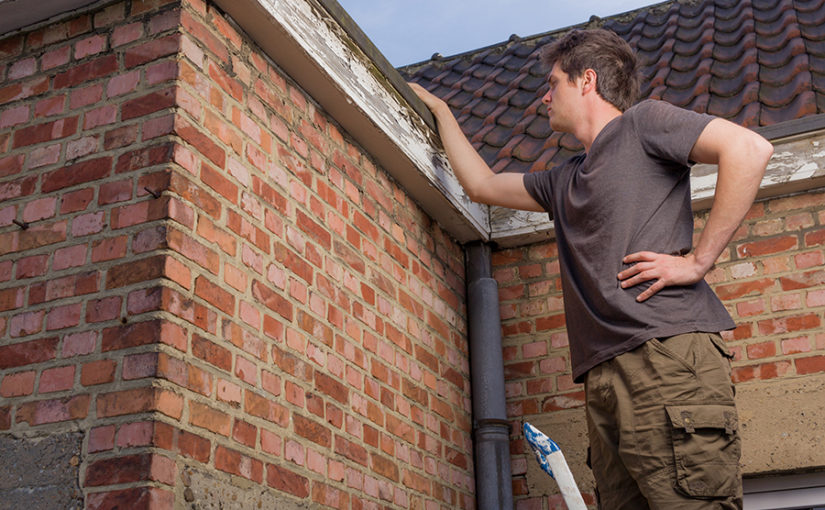
After a severe storm passes, it’s crucial to assess your home for any damage it may have sustained, particularly to the roof. Your roof is your home’s first line of defense against the elements, so identifying and addressing any damage promptly can prevent further complications and costly repairs. Here’s a step-by-step guide to help you safely check your roof for storm damage.

Step 1: Safety First

Before you begin any inspection, prioritize your safety:

  • Wait for the Storm to Pass: Never attempt a roof inspection during inclement weather.
  • Use the Right Equipment: Wear rubber-soled shoes for better traction and use a sturdy ladder.
  • Consider a Professional: If accessing your roof is dangerous, or you’re unsure about what to look for, consider hiring a professional roofer.

Step 2: Start with a Ground-Level Inspection

Begin your inspection on the ground:

  • Walk Around Your Property: Look for signs of roof damage such as pieces of shingles, metal fascia, or other materials that may have fallen off the roof.
  • Check the Gutters and Downspouts: Heavy rains can dislodge gutters or fill them with debris. Ensure they are intact and clear of blockages.

Step 3: Check the Exterior from a Higher Vantage Point

If it’s safe to do so, use a ladder to get a closer look at your roof:

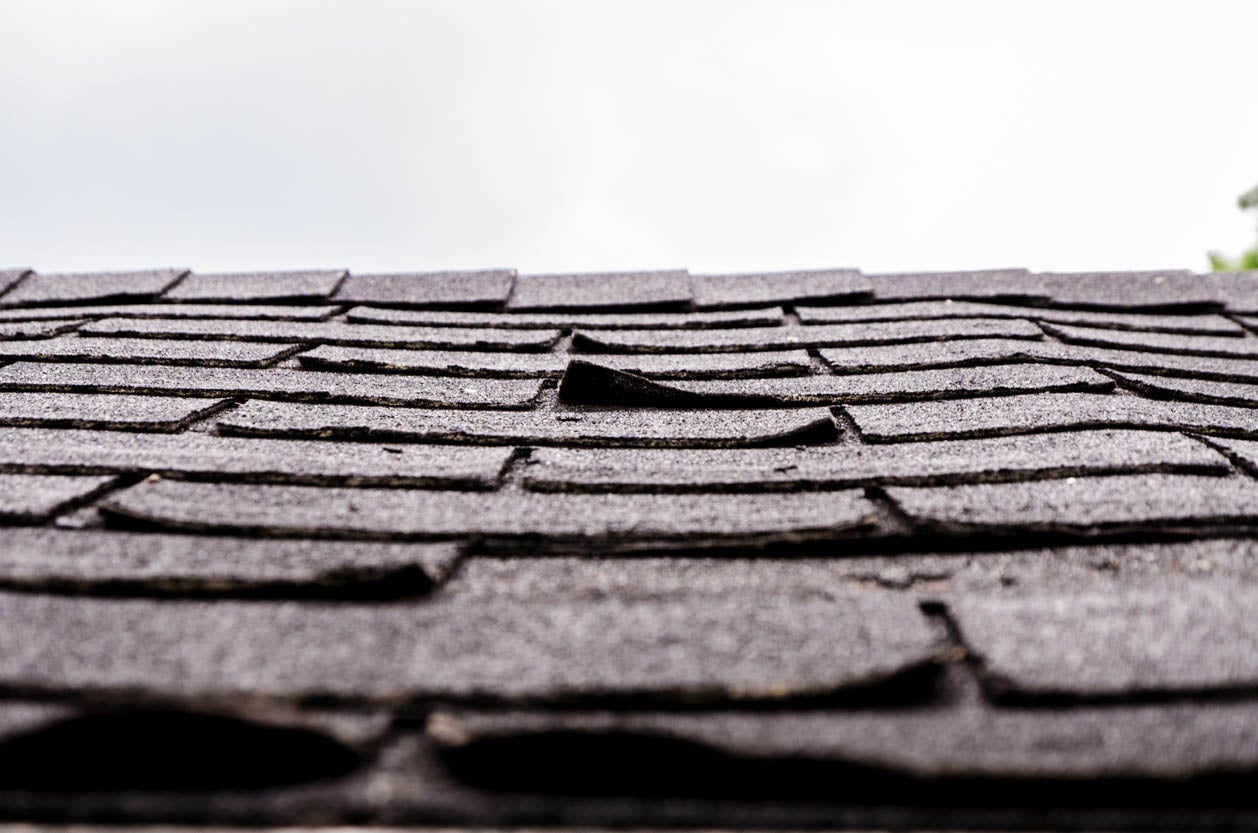
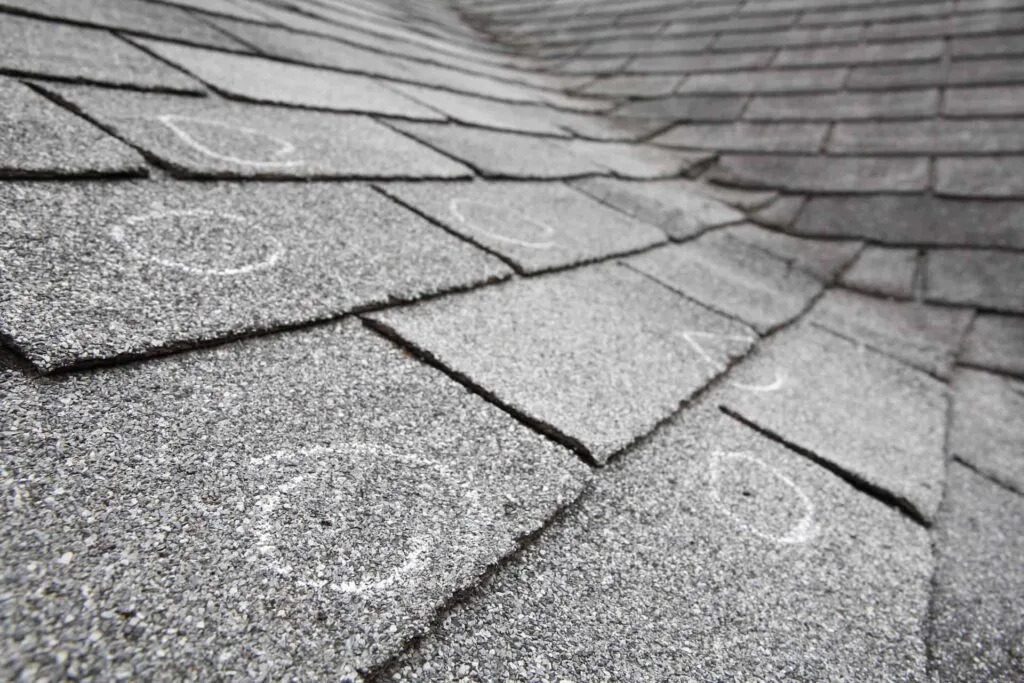
  • Examine the Shingles: Look for missing, cracked, curled, or dented shingles. Hail storms can leave distinct circular dents.
  • Inspect Metal Components: Check metal areas like vents, valleys, and flashing for dents, punctures, or dislodged parts.
  • Look at the Chimney: Ensure the chimney caps are intact and the mortar hasn’t cracked.

Step 4: Inspect the Attic

Sometimes, the first signs of roof damage are visible from inside:

  • Look for Leaks or Water Damage: Check the underside of the roof for dampness or water stains, especially after a heavy rain.
  • Check Insulation: Wet insulation is a sure sign of water penetration.
  • Spot Light Beams: During daytime, look for any light beams coming through holes in the roof.

Step 5: Document the Damage

As you inspect, document any damage:

  • Take Photos: These are crucial for insurance claims and can be helpful for roof repair companies.
  • Make Notes: Detail the extent and location of the damage.

Step 6: Contact Professionals

After your inspection:

  • Consult a Roofing Professional: If you’ve identified damage, a professional can give you a more detailed assessment and discuss repair options.
  • Contact Your Insurance Company: Report the damage as soon as possible to begin the claims process.

Conclusion

Inspecting your roof after a storm is about ensuring the integrity of your home and the safety of those inside it. By following these steps, you can identify potential problems early and take appropriate action to repair them. Remember, when in doubt, it’s always safer and more effective to call on the expertise of a professional roofing contractor.

By maintaining vigilance and addressing damage promptly, you ensure that your roof continues to serve its vital role as your home’s primary protector against the elements.

Tips & tricks

Getting Your Roof Ready for Winter

Winter is coming, and with it comes the risk of roof damage from snow, ice, wind, and cold. Your roof is your home’s first line of defense against the elements, so it’s important to make sure it’s in good shape before the winter season arrives. Here are some tips on how to prepare your roof for winter and avoid costly repairs later.

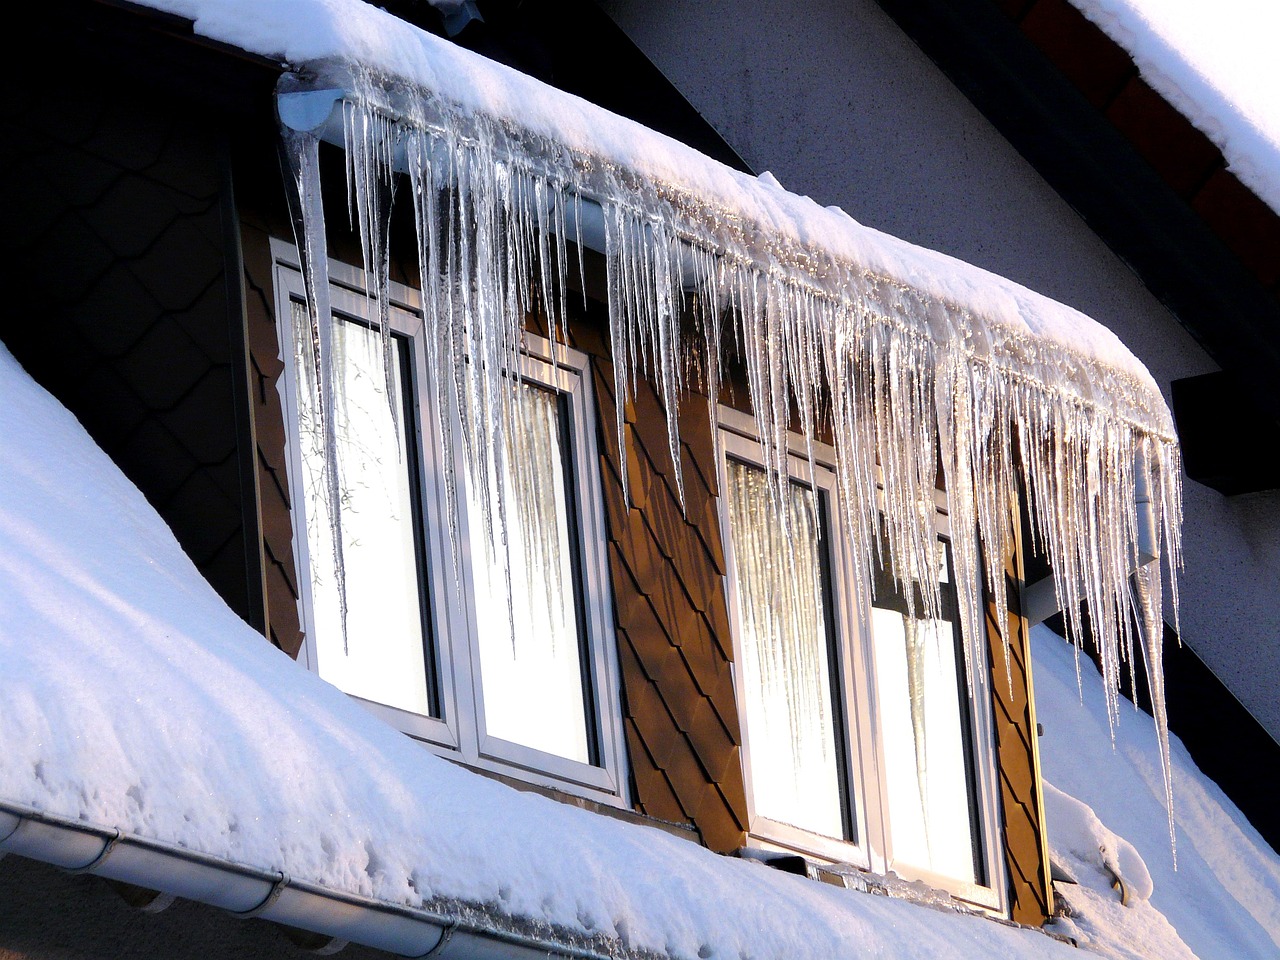
  1. Clean your gutters and downspouts. Clogged gutters can cause water to back up and freeze on your roof, creating ice dams that can damage your shingles, flashing, and insulation. Ice dams can also cause leaks and mold growth inside your home. To prevent this, clear out any leaves, twigs, dirt, and debris from your gutters and downspouts before winter. You can do this yourself or hire a professional gutter cleaning service. You may also want to install gutter guards to keep your gutters free of debris in the future.
  2. Inspect your attic for proper ventilation and insulation. Your attic plays a key role in regulating the temperature and moisture levels of your roof. If your attic is poorly ventilated or insulated, it can cause heat to escape from your home and warm up your roof, melting the snow and creating ice dams. It can also cause condensation to form on your roof deck, leading to rot and mold. To prevent this, make sure your attic has adequate ventilation and insulation. You should have vents on the roof, soffits, and gables to allow air to circulate and prevent moisture buildup. You should also have enough insulation to keep your home warm and prevent heat loss. The recommended amount of insulation varies depending on your climate and your type of roof, but generally, you should aim for an R-value of at least 38.
  3. Check for missing or damaged shingles. Missing or damaged shingles can expose your roof to water damage, leaks, and mold. If you have any shingles that are cracked, curled, loose, or missing, you should replace them as soon as possible. You can do this yourself if you have the skills and tools, or you can hire a professional roofer to do the job. You should also look for any signs of granule loss, which indicates that your shingles are worn out and need to be replaced. Granules are the small particles that coat the surface of your shingles and protect them from UV rays and weathering. If you see granules in your gutters or on the ground, it means your shingles are losing their effectiveness and may not last through the winter.
  4. Repair or replace damaged flashing. Flashing is the metal material that seals the gaps and joints around your chimney, skylights, vents, and valleys. Flashing prevents water from seeping into your roof and causing leaks and damage. However, flashing can also get damaged by wind, hail, or corrosion, leaving your roof vulnerable to water intrusion. To prevent this, inspect your flashing for any cracks, holes, rust, or loose nails. If you find any damage, you should repair or replace your flashing as soon as possible. You can do this yourself if you have the skills and tools, or you can hire a professional roofer to do the job.
  5. Replace old or worn-out caulking. Caulking is the sealant that fills the gaps and cracks around your roof fixtures, such as vent pipes, chimneys, and counter-flashing. Caulking prevents water from entering your roof and causing leaks and damage. However, caulking can also deteriorate over time, especially in cold weather, and lose its effectiveness. To prevent this, check your caulking for any signs of cracking, peeling, or separation. If you find any damage, you should replace your caulking as soon as possible. You can do this yourself if you have the skills and tools, or you can hire a professional roofer to do the job.
  6. Trim the trees around your roof. Trees can provide shade and beauty to your home, but they can also pose a threat to your roof in winter. Branches can break off and fall on your roof, causing damage to your shingles, flashing, and gutters. Leaves and needles can accumulate on your roof, creating a fire hazard and blocking your drainage system. To prevent this, trim any branches that are overhanging or touching your roof. You should also remove any dead or diseased trees that could fall on your roof during a storm. You can do this yourself if you have the skills and tools, or you can hire a professional tree service to do the job.
  7. Add a heat cable to prevent ice dams. A heat cable is a device that runs along the edge of your roof and emits a low level of heat to prevent ice from forming. A heat cable can help prevent ice dams, which are ridges of ice that form at the edge of your roof and prevent melted snow from draining off. Ice dams can cause water to back up and seep under your shingles, causing leaks and damage. To prevent this, you can install a heat cable along the eaves of your roof, especially if you have a low-pitched or flat roof. You can do this yourself if you have the skills and tools, or you can hire a professional roofer to do the job. However, keep in mind that a heat cable is not a permanent solution and should be used in conjunction with proper ventilation and insulation.
  8. Get your roof rake ready. A roof rake is a tool that allows you to remove snow from your roof without climbing on it. Removing snow from your roof can help prevent ice dams, leaks, and damage. However, you should only do this if you can safely reach your roof from the ground or a ladder. You should also be careful not to damage your shingles, flashing, or gutters with the rake. You can buy a roof rake at any hardware store or online.
  9. Hire a professional roofer for a thorough inspection. While you can perform some of the roof maintenance tasks yourself, it is always a good idea to hire a professional roofer for a thorough inspection before winter. A professional roofer can spot any issues that you may have missed, such as hidden leaks, structural damage, or mold growth. They can also provide you with expert advice and recommendations on how to improve your roof’s performance and durability. A professional roofer can also perform any repairs or replacements that you may need, such as installing new shingles, flashing, or insulation. Hiring a professional roofer can save you time, money, and hassle in the long run, as well as ensure your roof’s safety and longevity.

By following these tips, you can prepare your roof for winter and protect your home from the harsh weather conditions. A well-maintained roof can also increase your home’s value, curb appeal, and energy efficiency. So don’t wait until it’s too late, get your roof ready for winter today!

Tips & tricks

The Top Common Roofing Issues You Should Be Aware Of

Roofs are the unsung heroes of our homes, quietly doing their job day after day, protecting us from the elements. However, even the best-constructed roofs can fall victim to issues over time. Understanding the common problems can save you from costly repairs or even an entire roof replacement down the line. Here’s a rundown of some of the most frequent issues homeowners face, along with preventative tips to help you keep your roof in tip-top shape.

1. Leaks and Moisture Damage

The Issue: Leaks are the bane of any homeowner’s existence and can lead to significant water damage if not addressed promptly. Often caused by cracked or missing shingles, poor flashing, or worn-out seals, leaks are the most common roofing problem.

Prevention: Regularly inspect your roof for damaged shingles and replace them as needed. Make sure all flashing is securely in place and that seals are tight.

2. Poor Installation

The Issue: You get what you pay for, and skimping on a professional installation can lead to a plethora of problems, from leaks to structural issues.

Prevention: Always opt for qualified and experienced contractors for any roofing project. Check reviews, get multiple quotes, and ask for references.

3. Wind and Storm Damage

The Issue: Storms and high winds can wreak havoc on roofs, ripping off shingles and causing leaks.

Prevention: After a major storm, inspect your roof for damage or hire a professional to do so.

4. Tree Damage

The Issue: Overhanging tree branches can scrape against shingles, wearing away their protective layer, or even worse, fall and cause significant damage.

Prevention: Regularly trim back any branches getting too close to your roof.

5. Shingle Deterioration

The Issue: Over time, shingles can curl, crack, or lose their protective granules, leading to less effective water shedding.

Prevention: Check your shingles every season and replace any that are showing signs of wear.

6. Ponding Water

The Issue: Flat roofs or those with inadequate drainage can collect water, leading to leaks and structural problems.

Prevention: Install proper drainage systems, including gutters and downspouts, and ensure your roof is sloped adequately to direct water away.

7. Punctures

The Issue: Wildlife, hail, or even foot traffic during maintenance can puncture a roof, leading to leaks.

Prevention: Limit foot traffic on your roof and check for damage if you suspect any activity has occurred.

8. Thermal Shock

The Issue: Extreme temperature fluctuations can cause roofing materials to expand and contract, leading to cracks and other issues.

Prevention: Properly insulating your attic can mitigate extreme temperature changes, and some modern roofing materials are designed to withstand thermal shock better than others.

Conclusion

Keeping a vigilant eye on your roof’s condition can prevent minor issues from turning into major problems. Regular inspections and timely repairs can extend the lifespan of your roof and save you significant money in the long run. If you encounter any of these issues, it’s often a good idea to consult professionals, even if you’re a seasoned DIYer. A well-maintained roof is not just a shelter over your head; it’s an investment in your home’s future.


An ounce of prevention is worth a pound of cure, especially when it comes to roofing!

Style Tips & tricks

How to Choose the Best Roof Material for Your Climate and Budget

If you’re planning to replace your roof, you might be wondering what kind of roofing material is best for your home. There are many factors to consider, such as the durability, cost, style, and energy efficiency of different roofing options. But one of the most important aspects is how well the roof can withstand the weather conditions in your area.

Different climates have different challenges for roofs, such as heat, cold, rain, snow, hail, wind, and fire. Choosing the wrong material can lead to premature wear and tear, leaks, mold, and even structural damage. That’s why it’s essential to do some research and find out what roofing materials are best suited for your climate and budget.

In this blog post, we’ll review some of the most common roofing materials and how they perform in various climates. We’ll also give you some tips on how to choose the best roof material for your home.

Asphalt Shingles

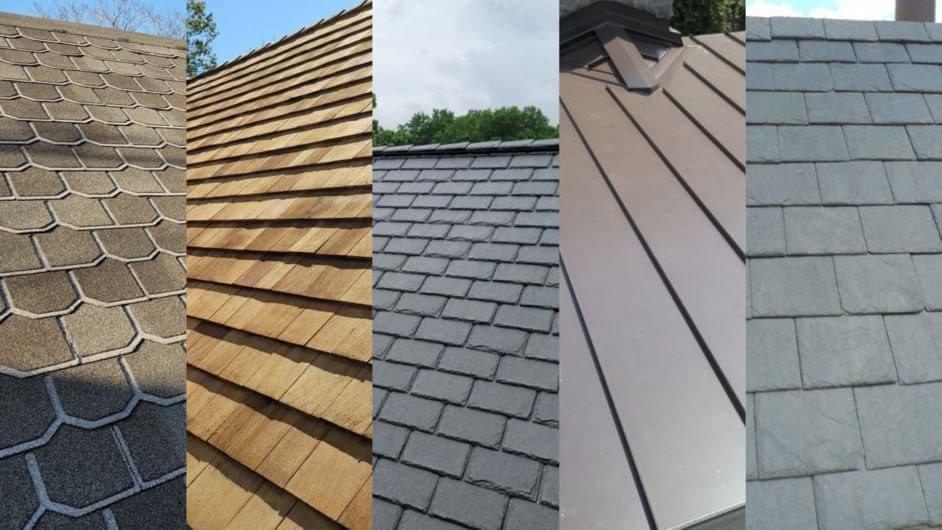
Asphalt shingles are the most popular roofing material in the U.S., mainly because they are affordable, easy to install, and versatile. Asphalt shingles are made of fiberglass or cellulose mat coated with asphalt and mineral granules. They come in different colors, styles, and quality levels.

Asphalt shingles are a good choice for moderate climates that don’t experience extreme temperatures or weather events. They can resist wind, rain, and fire, but they may fade or crack under intense heat or UV rays. They may also be prone to damage from hail or ice dams.

Asphalt shingles have a lifespan of about 25 years on average, but this can vary depending on the quality of the shingles and the installation. Asphalt shingles are also recyclable, which makes them more eco-friendly than some other roofing materials.

Metal Roofing

Metal roofing is a durable and long-lasting option that can withstand harsh weather conditions. Metal roofing is made of metal panels or tiles that are attached to the roof deck with fasteners or clips. Metal roofing can be made of different metals, such as steel, aluminum, copper, or zinc.

Metal roofing is a great choice for hot climates because it reflects heat and UV rays, keeping your home cooler and reducing your energy bills. Metal roofing is also resistant to fire, wind, hail, and snow. It can also handle cold climates well because it sheds snow and ice easily.

Metal roofing has a lifespan of 40 to 70 years or more, depending on the type and quality of the metal. Metal roofing is also recyclable and can be installed over existing roofs, which reduces waste and labor costs.

Slate Roofing

Slate roofing is a natural and elegant option that can add value and beauty to your home. Slate roofing is made of thin slices of slate stone that are cut and shaped into tiles. Slate roofing comes in different colors, sizes, and textures.

Slate roofing is one of the most durable and weather-resistant roofing materials available. It can handle heat, cold, rain, snow, hail, wind, and fire with ease. It also requires very little maintenance and can last for over 100 years if installed properly.

Slate roofing is also one of the most expensive roofing materials on the market. It requires skilled installation and special tools and equipment. It is also very heavy and may not be suitable for some roof structures.

Clay Tile Roofing

Clay tile roofing is a traditional and attractive option that can give your home a Mediterranean or Spanish look. Clay tile roofing is made of clay or ceramic tiles that are shaped into curved or flat pieces. Clay tile roofing comes in different colors, shapes, and patterns.

Clay tile roofing is ideal for hot and dry climates because it reflects heat and UV rays, keeping your home cool and comfortable. Clay tile roofing is also fire-resistant and durable. It can last for 50 to 100 years or more with proper care.

Clay tile roofing is not a good choice for cold or wet climates because it can crack or break under freezing temperatures or moisture. It is also very heavy and may require additional support for your roof structure.

Wood Shingle or Shake Roofing

Wood shingle or shake roofing is a natural and rustic option that can add charm and character to your home. Wood shingle or shake roofing is made of wood pieces that are split or sawn from logs. Wood shingle or shake roofing comes in different types of wood, such as cedar, pine, or redwood.

Wood shingle or shake roofing is a good choice for dry climates because it has good insulation properties and can keep your home warm in winter and cool in summer. Wood shingle or shake roofing is also wind-resistant and impact-resistant.

Wood shingle or shake roofing is not recommended for wet or humid climates because it can rot, warp, or grow mold over time. It is also susceptible to fire and insects and may require regular treatment and maintenance. Wood shingle or shake roofing has a lifespan of 20 to 40 years, depending on the type and quality of the wood.

Choosing the best roof material for your climate and budget is not an easy task, but it can make a big difference in the performance, longevity, and appearance of your roof. Before you decide on a roofing material, you should consider the following factors:

  • The climate and weather conditions in your area
  • The style and design of your home
  • The cost and availability of the roofing material
  • The installation and maintenance requirements of the roofing material
  • The environmental impact and sustainability of the roofing material

You should also consult with a professional roofing contractor who can advise you on the best roofing material for your home and provide you with a quality installation and warranty.

We hope this blog post has given you some useful information and tips on how to choose the best roof material for your climate and budget. If you have any questions or comments, please feel free to contact us. We’d love to hear from you!

Style

Choosing the Right Gutter Style for Your Home

Homeowners often overlook the significance of their home’s gutters, but these key pieces of the roofing system do much more than merely directing rainwater away from the house. The right gutter style can enhance the exterior aesthetic of your home, increase its value, and, most importantly, protect it from water damage.

The Basics of Gutter Styles

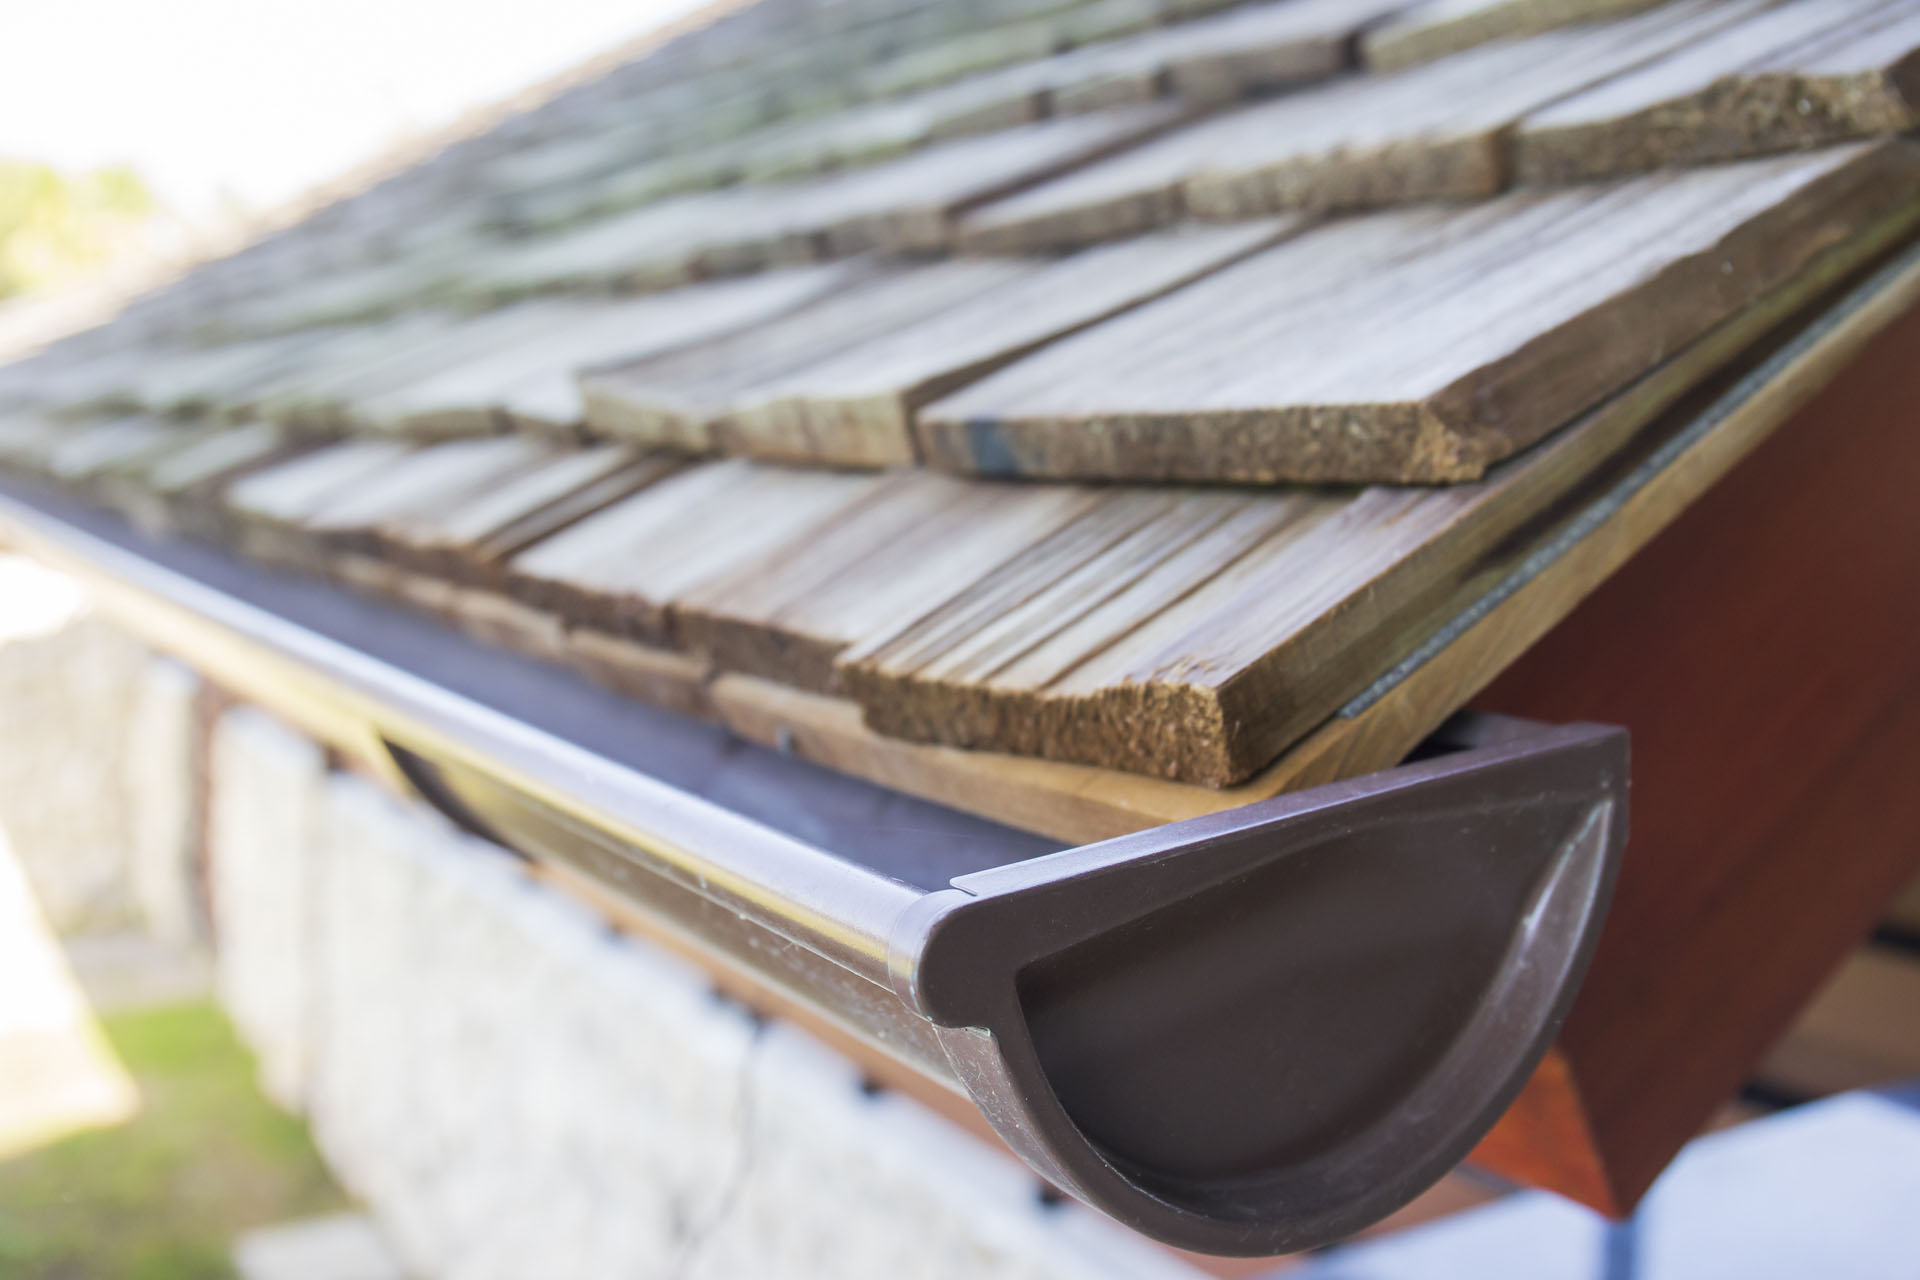
There are primarily two styles of gutters: K-style gutters and half-round gutters. The ‘K’ and ‘half-round’ refer to the shape of the gutter when looked at from a cross-section.

  1. K-Style Gutters: Named for their shape, which resembles the letter ‘K’ when viewed in profile, K-style gutters are by far the most popular choice in the United States. The flat back and bottom and decorative front that often mimics crown molding give these gutters their distinctive profile. K-style gutters offer high water capacity, are available in various sizes and materials, and their flat back design makes them easier to mount directly to the fascia.
  2. Half-Round Gutters: These gutters are shaped like a tube cut in half. Half-round gutters are a more traditional choice, often seen in older, historic homes. While they may not hold as much water as K-style gutters, their smoothness leads to less corrosion over time. They are slightly more challenging to install, given that they require specific brackets or threaded rods.

Material Matters

Different gutter styles are available in different materials, each offering its own set of benefits and drawbacks. Some common materials include:

  1. Aluminum: Lightweight and resistant to rust, aluminum is an excellent all-around choice. It’s flexible, which makes it easier to install, and it’s available in a broad range of colors.
  2. Copper: Copper gutters offer unmatched durability and a beautiful, distinctive look that patinas over time. They’re often used on historic or high-end homes. While expensive, they have a long lifespan and require less maintenance.
  3. Vinyl: Vinyl gutters are lightweight, affordable, and easy to install. They resist rusting and rotting but can become brittle and crack in extremely cold climates.
  4. Steel: Steel gutters are durable and can handle heavy rainfalls. They’re more substantial and more resistant to wind and other types of damage. However, they can rust if not properly treated.

Choosing the Right Gutter Style for Your Home

When choosing a gutter style, consider the following:

  1. Architectural Style: Choose a style that matches your home. K-style gutters, for example, are suitable for modern homes, while half-round gutters complement homes with a traditional or historic design.
  2. Climate: If you live in an area with heavy rainfall, you’ll need a gutter style and material that can withstand those conditions. K-style gutters and steel gutters would be suitable options in this case.
  3. Maintenance: If you don’t want to spend a lot of time on maintenance, opt for materials like aluminum or copper, which require less upkeep.
  4. Budget: Prices for gutters vary depending on the style and material you choose. Consider a budget-friendly option if finances are a constraint, like vinyl for instance.

Remember, your home’s gutters are an investment in its long-term health and beauty. Therefore, it’s worth spending some time and effort in choosing the right gutter style that serves both functional and aesthetic purposes.

Choosing a gutter style that suits your home’s architecture, fits your budget, and caters to your region’s climate can save you from potential headaches down the line. In conclusion, keep in mind that while style and appearance matter, the primary function of your gutters is to protect your home from water damage efficiently.

Inspiration Style

Why Skylights are a Brilliant Addition to Your Home

In the realm of home improvements, few additions can match the transformative power of a skylight. These captivating architectural features not only enhance the aesthetic appeal of a home but also offer numerous practical benefits. If you’re contemplating ways to invigorate your living space, consider the magic of a skylight. In this blog post, we’ll explore the compelling reasons why installing a skylight should be high on your home improvement agenda.

Natural Light and a Breath of Fresh Air

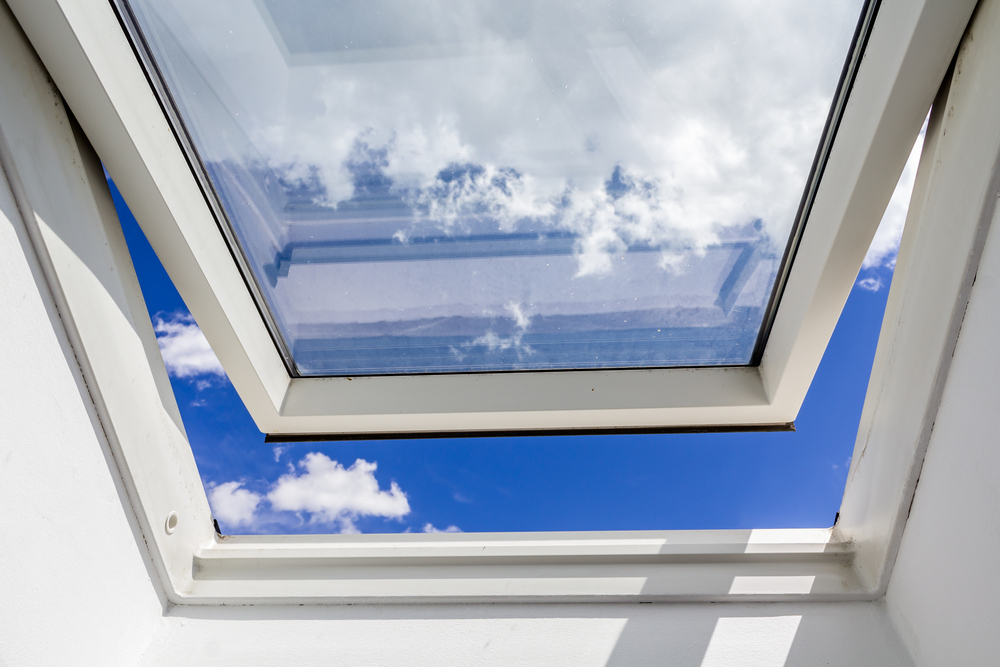
Skylights provide an incredible source of natural light, making your home brighter, more inviting, and visually appealing. The sunlight streaming in through the skylight creates an atmosphere of warmth and openness, giving rooms a more spacious feel. By eliminating the need for artificial lighting during the day, skylights also help reduce energy consumption and lower electricity bills. Additionally, skylights can be designed to open, allowing fresh air to circulate throughout your living space, promoting better ventilation and a healthier indoor environment.

Health and Well-being

Exposure to natural light has numerous health benefits. Studies have shown that sunlight stimulates the production of vitamin D in our bodies, which plays a crucial role in maintaining bone health and strengthening the immune system. Moreover, natural light has a positive effect on our mood and mental well-being, reducing stress and increasing productivity. By incorporating skylights, you can enjoy these health benefits without leaving the comfort of your home.

Energy Efficiency

In an era of growing environmental consciousness, energy efficiency is a significant consideration for homeowners. Skylights, when strategically positioned, can effectively reduce the need for artificial lighting during daylight hours. By harnessing the sun’s rays, you can minimize reliance on electric lighting, saving both energy and money. Additionally, skylights can be equipped with glazing options that provide excellent thermal insulation, preventing heat loss during winter and heat gain in summer. This translates to lower heating and cooling costs and a reduced carbon footprint.

Aesthetics and Interior Design

Skylights add an undeniable touch of elegance and sophistication to any home. The infusion of natural light creates a sense of harmony with the outdoors, allowing you to connect with nature even when you’re indoors. The play of light and shadow adds depth and dimension to your living space, enhancing the architectural details and creating a more visually stunning environment. Whether it’s a starry night sky or a radiant sunrise, skylights offer a unique vantage point to admire the beauty of the world above.

Privacy and Views

Skylights provide an innovative solution for homeowners seeking privacy while still enjoying an unobstructed view of the sky. Unlike windows, skylights are typically positioned on the roof, offering a clear line of sight to the heavens without compromising privacy. With the right placement, you can indulge in stargazing or marvel at the ever-changing cloud formations, all while maintaining a sense of seclusion from the outside world.

Skylights are not just windows on your roof; they are gateways to a brighter, healthier, and more captivating home. From the tangible benefits of natural light and improved ventilation to the intangible allure of a beautifully illuminated space, skylights have the power to transform your living environment. Consider adding a skylight to your home, and let the sunshine in as you experience the joy of living under an open sky.

Tips & tricks

Essential Summer Inspections to Ensure a Sound Roof

As summer arrives, it’s the perfect time to give your roof some well-deserved attention. Conducting regular inspections can help identify and address potential issues before they become major problems. In this blog post, we’ll highlight key roofing issues to check for every summer, ensuring the longevity and integrity of your roof.

  1. Shingle Damage: Inspect your shingles for signs of damage such as cracks, curling, or missing pieces. These issues can compromise your roof’s ability to protect against the elements. Replace any damaged shingles promptly to maintain a watertight seal.
  2. Leaks and Water Damage: Check for signs of water intrusion, such as water stains on the ceiling or walls, peeling paint, or mold growth. Inspect the attic for any signs of moisture, including damp insulation or rotting wood. Addressing leaks early can prevent further damage to your home’s interior.
  3. Gutters and Downspouts: Clean out debris from gutters and downspouts to ensure proper water drainage. Clogged gutters can lead to water overflow, which can damage the roof and cause foundation issues. Check for any loose or damaged sections and repair or replace them as necessary.

By performing these essential summer inspections, you can stay proactive in maintaining a healthy roof. Remember, if you encounter any significant issues or feel unsure about conducting a thorough inspection yourself, it’s always wise to consult with a professional roofing contractor. Your diligence in caring for your roof will pay off in the long run, ensuring a safe and secure home for years to come.

Style

Why You Should Consider a Metal Roof for Your Home

The Undeniable Benefits of a Modern Roofing Solution

As a homeowner, you’re always looking for the best options to maintain and improve your home’s value, comfort, and appearance. One aspect that may not come to mind immediately is your roof. However, the right roof can make all the difference when it comes to the long-term benefits of your home. In this article, we’ll discuss why a standing metal seam roof should be at the top of your list for home improvement projects.

What is a Standing Metal Seam Roof?

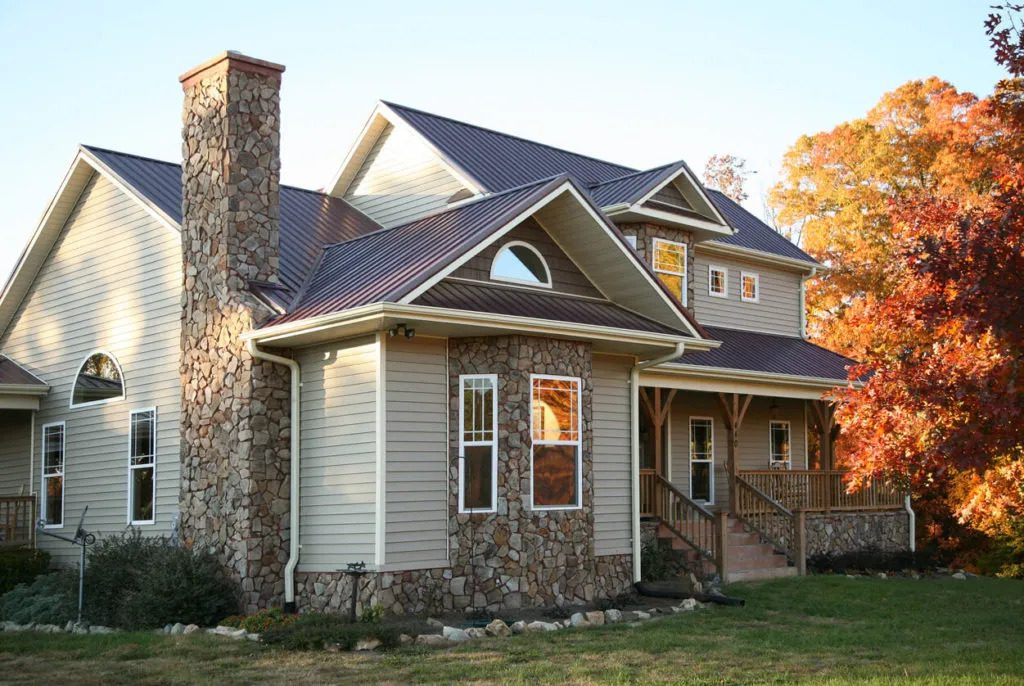
A standing metal seam roof is a type of metal roofing system that features continuous, interlocking panels that run vertically from the ridge of the roof down to the eaves. These panels are secured with concealed fasteners, creating a sleek, modern appearance. The “seams” in this roofing system are raised above the flat surface, which gives it the name “standing seam.”

Durability and Longevity

One of the most significant advantages of a standing metal seam roof is its durability. These roofs are made from high-quality metal materials like steel, aluminum, or copper, and are designed to withstand extreme weather conditions, including heavy rain, snow, hail, and high winds. They are also resistant to rust, rot, and insect infestations. With proper installation and maintenance, a standing metal seam roof can last 40-70 years, outlasting traditional asphalt shingle roofs by decades.

Energy Efficiency

Standing metal seam roofs are known for their energy efficiency, helping homeowners save on energy bills. The reflective nature of the metal panels helps deflect solar heat, keeping your home cooler in the summer months. Some metal roofing systems also feature cool-roof coatings that further increase energy efficiency by reflecting more sunlight and reducing heat transfer into your home. As a result, your air conditioning system won’t have to work as hard to maintain a comfortable temperature, leading to lower energy costs.

Low Maintenance

Compared to other roofing materials, standing metal seam roofs require minimal maintenance. They’re resistant to common problems such as leaks, rot, and mold, which means you’ll spend less time and money on repairs. Additionally, the concealed fasteners used in the installation process help prevent the loosening or shifting of panels over time, reducing the likelihood of maintenance issues.

Environmentally Friendly

If you’re looking for a sustainable and environmentally-friendly roofing option, standing metal seam roofs are an excellent choice. The materials used in these roofs are often made from recycled metals and can be recycled again at the end of their lifespan. This reduces waste and the need for new raw materials. Additionally, their energy efficiency can contribute to a reduced carbon footprint for your home.

Aesthetic Appeal

Standing metal seam roofs are not just functional, but they also offer a modern and sleek appearance that can enhance your home’s curb appeal. They come in a variety of colors, finishes, and materials, allowing you to customize the look to match your home’s style. The clean lines and smooth appearance of these roofs can add a contemporary touch to any home design.

When it’s time to replace or upgrade your home’s roof, a standing metal seam roof is a smart investment. With its unparalleled durability, energy efficiency, lo

Tips & tricks

How To Tell If There Is Hail Damage To Your Roof?

Hail damage to roofs is a common problem that homeowners face, particularly during the storm season. Hailstones can cause significant damage to the roof, leading to leaks, cracks, and other issues that can compromise the integrity of your home. While hail damage can be difficult to detect, it is essential to identify it early to prevent further damage and costly repairs. In this article, we will discuss how to tell if there is hail damage to your roof, the signs to look out for, and the steps you can take to assess and repair the damage. We will also provide you with some preventive measures to protect your roof from future hail damage and tips on how to file an insurance claim if necessary.

1. Understanding the Anatomy of a Roof and Its Vulnerability to Hail Damage

Roof Anatomy: Components and Their Functions

To understand how hail damage can impact your roof, it’s important to first understand its anatomy. The key components of a roof include the shingles, underlayment, decking, and ventilation. The shingles are the outermost layer, serving as the first line of defense against the elements. The underlayment acts as a waterproof barrier, while the decking provides structural support. Ventilation plays a vital role in keeping the roof dry and cool.

How Hail Damage Affects Different Roofing Materials

Different roofing materials can be affected by hail in different ways. For example, asphalt shingles can become cracked or dented, while metal roofs can develop surface dimples. Occasionally, hail can even cause shingles to detach from the roof entirely. The size and velocity of the hailstones can also influence the type and severity of damage incurred.

2. Signs of Hail Damage to Look Out For

Exterior Signs of Hail Damage

The exterior of the roof is the most visible place to identify hail damage. Look for dents or cracks in the shingles, as well as missing shingles or granules. Also, check for punctures or holes in metal roofs. Other signs of damage include bent or broken gutters, dented vents, or cracked chimney caps.

Interior Signs of Hail Damage

Interior signs of hail damage can be more difficult to spot. Look for water stains or leaks in the ceiling or attic after a hail storm, which can indicate damage to the roof. Also, check for dents or holes in roof vents, which can cause moisture to enter the house.

3. Inspecting the Roof: Steps to Take to Assess Hail Damage

Pre-Inspection Preparations

Before inspecting your roof, ensure your own safety by waiting until the roof is dry, wearing non-slip shoes, and using a sturdy ladder. Once you’re ready, gather a measuring tape, a camera, and a notebook to record your findings.

How to Conduct a Roof Inspection for Hail Damage

Begin by inspecting the roof from the ground, looking for visible damage to the shingles, gutters, and vents. If possible, climb onto the roof to get a closer look, being careful not to step on any damaged areas. Check for soft spots, cracked or missing shingles, and granule loss. Finally, take photos of any damage and record the date and time of the inspection.

4. When to Call in an Expert Roofer for Inspection

Why You Need a Professional Inspection

While it’s possible to identify some hail damage on your own, it’s always recommended to call in a professional roofer for a thorough inspection. They have the expertise and experience to detect subtle signs of damage that you may miss. Additionally, they can provide an estimate and advice on repair or replacement options.

What to Look for in a Roofing Contractor

When selecting a roofing contractor, ensure that they are licensed, bonded, and insured. Look for a company with a good reputation, solid warranty, and clear communication. It’s also important to obtain multiple estimates and review the contract carefully before signing. By choosing a reliable contractor, you can ensure that your roof is properly repaired and protected from future hail damage.

5. Repairing Hail Damage: DIY vs. Professional Services

Hailstorms can cause significant damage to your roof, and if left unaddressed, it can lead to more severe issues like leaks and structural damage. If your roof suffers from minor hail damage, you can choose to repair it yourself or hire professional services.

DIY Repair Tips for Minor Hail Damage

If the damage is minimal, you can fix it yourself. You will need to inspect your roof for dents or cracks and remove any debris that may have accumulated. You will also need to replace any damaged shingles or tiles. It’s essential to remember that repairing hail damage requires some degree of expertise, so make sure that you know what you’re doing before attempting to fix it yourself.

When to Hire Professional Services

If the hail damage is extensive, or you’re unsure of how to repair it, it’s best to hire professional services. Professional roofers have the necessary tools and expertise to repair your roof, and they can identify any other underlying issues. They can also ensure that your roof is in good condition, preventing further damage.

6. Preventive Measures to Protect Your Roof from Future Hail Damage

Preventing hail damage from occurring in the first place is always better than repairing it after the fact. There are several measures you can take to protect your roof from future hail damage.

How to Prepare Your Roof for Hail Season

Before hail season arrives, you should prepare your roof. Inspect it for any signs of damage or wear and tear and ensure that all the shingles and tiles are intact. You may also want to consider installing impact-resistant roofing materials that can withstand hail.

Investing in Protective Roofing Materials

Investing in protective roofing materials is another way to prevent future hail damage. Impact-resistant shingles or tiles can help reduce the damage from hail and other hazards. If you live in an area that experiences frequent hailstorms, investing in these materials is a wise choice.

7. Insurance Coverage for Hail Damage: What You Need to Know

If your roof suffers hail damage, you may be covered by your insurance policy. However, it’s essential to know what your insurance covers and how to file a claim.

Understanding Your Insurance Policy Coverage

Read your insurance policy to understand what it covers. Most policies cover hail damage, but some may exclude it or require additional coverage. Also, check the deductible amount and ensure that it’s worth filing a claim.

How to File a Hail Damage Insurance Claim

If your roof suffers hail damage, document it with photos and contact your insurance provider. You will need to provide evidence of the damage, and a claims adjuster will assess the damage and estimate repair costs. Once your claim is approved, you can proceed with the repairs.In conclusion, detecting hail damage on your roof is crucial to maintaining the integrity of your home. While some damages can be repaired with DIY methods, others may require professional services. By following the steps outlined in this article, you can detect, assess, and repair the damage caused by hailstones. Don’t hesitate to seek the help of a professional if necessary, and always take preventive measures to protect your roof from future hail damage.

Tips & tricks

4 Maintenance Tasks That Will Keep Your Roof in Good Condition for Years

Roof maintenance may seem intimidating. In fact, many homeowners don’t know how to start taking care of their roofs to make them last longer. Luckily, there are several simple and easy tasks that will keep your roof in good condition for years.

Clean Your Gutters

Gutters are in strategic places to collect rainwater runoff from your shingles and direct it safely. Without gutters, rain would fall off your house and could cause extreme damage by collecting around your foundation. When gutters fill with leaves and other debris, water steadily collects in the gutter canal until it floods beneath your shingles and causes deterioration. To prevent damage, make cleaning your gutters a regular routine. The best time to clean them is before it rains because you can use a leaf blower instead of having to rake out sticky, wet leaves and sticks.

Scrub Away Moss and Algae

Scrubbing your roof to get rid of moss and algae is a less regular maintenance task but just as essential as cleaning the gutters. While most moss is typically harmless, it does create an unattractive appearance on the roof and will cause damage in the long run. On the other hand, algae can be disastrous and wreak havoc on your shingles. Depending on your residence and the surrounding climate, you may never or rarely have moss and algae grow on your roof. However, in most places with frequent rain and shade, moss and algae will pop up, eventually. To scrub them off your shingles, create a mixture that is half parts chlorine bleach and half parts water. Most algae and moss should wipe away easily.

Schedule Regular Roof Maintenance

While there are plenty of roof maintenance tasks the average homeowner can do independently, it is best safety practice to contact a residential roofing contractor if there is a serious issue or even for a regular check-up. A professional roofing contractor can catch problems before they become hazardous to your health and wallet. They can also do more complicated tasks like repairing and replacing damaged shingles. As for safety, they can do in-depth inspections on the wall cladding, flashing, and soil stack. Additionally, if you want to invest in solar panels, residential roofing contractors are also the best choice.

Remove Tree Branches

Finally, a fantastic preventative roof maintenance task is removing big tree branches or nearby debris. During a storm, these tree branches could cause massive damage to your residence. You should regularly check if there are any trees or nearby structures that present a safety hazard. While some branches will require professional help, there are smaller branches that you can easily remove with standard yard tools.

By making roof maintenance part of your spring cleaning, you are making your home a safer place to live and saving yourself thousands of dollars of damages down the line.

Tips & tricks

How to Prepare a Roof for Winter

Autumn is the ideal time to care for your residential roofing system. By taking the following steps before winter arrives, you can stay comfortable during the colder months. You’ll save money in the long run since your heating equipment won’t have to work harder to cancel out drafts caused by roof leaks. Also, you won’t have to invest in extensive repairs in spring to reverse the effects of winter. 

3 Tips to Get Your Roof Ready for Winter

1. Clean Gutters

Your gutters channel rain runoff and melted snow to downspouts, which filter the water away from the property. When the drainage system is clogged with dirt, mud, leaves, and twigs, it won’t collect runoff. 

Instead, the water will pool on the roof and saturate the shingles down to the substrate. The excess moisture can cause the materials to rot and disintegrate. To avoid this problem, scoop out the grime from gutters at the beginning of the season. To avoid future problems, consider installing gutter guards that prevent debris from getting lodged in the channels. 

2. Trim Back Trees

Overhanging branches are hazards to your residential roofing system, especially during winter. Bearing the weight of heavy snow and ice buildup can cause the limbs to snap and crash down onto the membrane.

Squirrels and other animals can also use branches as walkways to access the roof and get inside your home for shelter from the cold weather. Trimming back branches a few feet will minimize the risk of roof damage and infestations.

3. Check the Attic

While standing on the sidewalk, you might not be able to see subtle problems with the roofing system. Luckily, inspecting the membrane from the attic can shed light on any potential concerns. 

With a flashlight, look for water droplets between rafters, moldy insulation, and rotted support beams. These types of water damage could be caused by roof leaks. You might also feel drafts from cold autumn air filtering through the vulnerable areas. It’s best to tell a professional about your findings so that they can take a closer look and perform the necessary repairs.

 SHARE